
How to use Signals with Angular Forms
Welcome everyone! Today, we're going to delve into how to use signals with your Angular forms and identify the best strategy to implement them.
Video
Why Use Signals?
You ask, "why should I integrate signals with my Angular forms?" It's simple. Signals are the future of reactivity in Angular and can be used to show derived states on the UI, as we often need in complex forms.
Take, for example, a straightforward form that collects the user's first and last names. These are material input fields, and it's desired to also display the full name beneath these input fields. To achieve this, we can store these field values in signals and generate a computed that gives us the full name from these signals.

No doubt, this is a rudimentary example. However, you can envision more intricate forms containing more complex derived state that you wish to exhibit on the UI.
Using the Value Property of Inputs with Signals
If you do not require any validations in these fields or don't need to utilize other forms API features, we can use the value property of the inputs. Here's the process, step by step.
- Create the signals necessary to hold these values. For instance, both "first name" and "last name" would be signals, each given empty values at the start.
firstName = signal("");
lastName = signal("");
- Directly input the value of the signal in the value property of the field.
<mat-form-field>
  <input [value]="firstName()" matInput placeholder="First Name" />
</mat-form-field>
<mat-form-field>
  <input [value]="lastName()" matInput placeholder="Last Name" />
</mat-form-field>
Remember, you need to unpack your signal’s value using parentheses.
Once your input fields bind the values directly from the signals, how do you go about updating the value? Here’s the trick: you can use the input event handler to update the value.
<mat-form-field>
  <input
    #firstNameField
    [value]="firstName()"
    (input)="firstName.set(firstNameField.value)"
    matInput
    placeholder="First Name"
  />
</mat-form-field>
<mat-form-field>
  <input
    #lastNameField
    [value]="lastName()"
    (input)="lastName.set(lastNameField.value)"
    matInput
    placeholder="Last Name"
  />
</mat-form-field>
Next, derive the full name from these signals and add this to our UI for the complete visibility of this implementation.
fullName = computed(() => `${this.firstName()} ${this.lastName()}`);
<h3>Full Name: {{ fullName() }}</h3>
This method works well, but with one significant drawback: if you need to add validations to the first name or the last name and show the errors, you have to do it manually. That could take a lot of time and effort!
Introducing Template Driven Forms
To handle the above problem, we can use the Template Driven Forms API in Angular.
-
Import the
FormsModulein your component imports, and use thengModeldirective in place of the value. -
Use
ngModelChangefor the input event parameter.
<mat-form-field>
  <input
    [ngModel]="firstName()"
    (ngModelChange)="firstName.set($event)"
    matInput
    placeholder="First Name"
    required
  />
</mat-form-field>
<mat-form-field>
  <input
    [ngModel]="lastName()"
    (ngModelChange)="lastName.set($event)"
    matInput
    placeholder="Last Name"
    required
  />
</mat-form-field>
When we test ths out, an 'empty field' is marked in red, alerting that the field is required. So the required validation is working, but how to show the error?
- Add an error message with
mat-error. - Export the 'firstNameControl' and 'lastNameControl' as
ngModel, and add a check for the required error.
<mat-form-field>
  <input
    #firstNameControl="ngModel"
    [ngModel]="firstName()"
    (ngModelChange)="firstName.set($event)"
    matInput
    placeholder="First Name"
    required
  />
  <mat-error *ngIf="firstNameControl.hasError('required')">
    This field is required
  </mat-error>
</mat-form-field>
<mat-form-field>
  <input
    #lastNameControl="ngModel"
    [ngModel]="lastName()"
    (ngModelChange)="lastName.set($event)"
    matInput
    placeholder="Last Name"
    required
  />
  <mat-error *ngIf="lastNameControl.hasError('required')">
    This field is required
  </mat-error>
</mat-form-field>
So it now shows our errors on our material fields nicely and we can add more validations as we wish using the Template Driven forms!

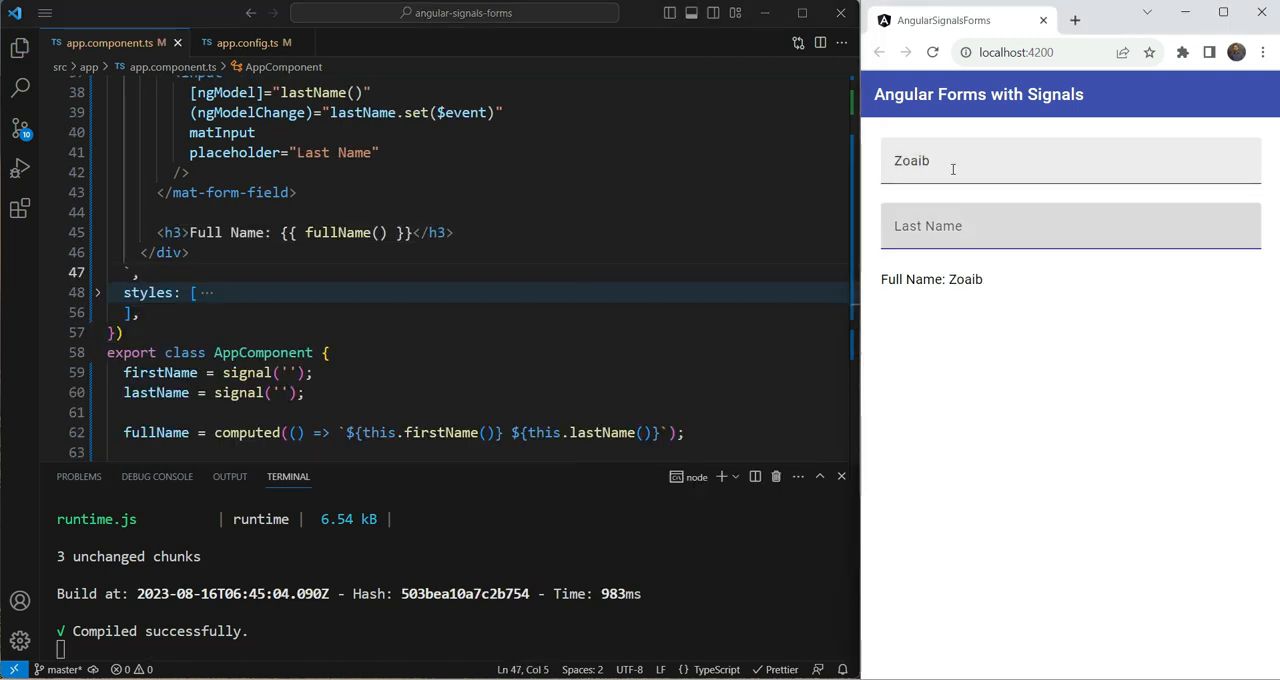
Lastly, let's validate if we can set our values, for instance, through an API call or from an external source. If we specify an initial value, does it pop up in the field here?
firstName = signal("Zoaib");
If the value shows up and the computed is updated, then our two-way data binding is working correctly!

Final Wisdom: Using Reactive Forms
You might be a fan of reactive forms, and for good reasons. They are robust and efficient; however, they do not pair well with signals. They already have built-in reactivity using RxJS and observables. Using them with signals might mean a redundancy of data and an unnecessary layer of complexity.
It's best to avoid reactive forms with signals unless there's an absolute need.
Hope you found this tutorial helpful! Do comment below and check back soon to stay updated with more insights on the Angular ecosystem.
Happy coding!
Check out my Angular and Firebase Authentication crash course

Use Angular 16, Angular Material and Firebase Authentication, Firestore and Storage to create a complete Sign Up App!
You may also like...


Learn Angular and Firebase!
Use Angular 16, Angular Material and Firebase Authentication, Firestore and Storage to create a complete Sign Up App!